Linux/Unix - Configuration
We have not yet tested all distributions (nor do we intend to!), just the most commonly-used ones.
Network Manager
Network manager is used by Ubuntu (and other Linux distributions) to manage network connections. It provides a convenient and user-friendly method of configuring VPN connections. It's used by default by desktop environments like Gnome and KDE. (Different desktop environments have different interfaces, so the images below might not match your experience perfectly. The available options should be the same, though.) If you don't use Network Manager then have a look at our general Linux instructions instead of this page.
The following instructions and screenshots are from Ubuntu 18.04.
First, ensure you have the network-manager-openvpn-gnome package installed (install it with sudo apt-get install network-manager-openvpn-gnome). If that package is not available, try network-manager-openvpn instead.
To configure the VPN using NetworkManager, open the menu in your notification area - usually the top-right corner of the screen, but not universally. You should see a menu similar to the one below:
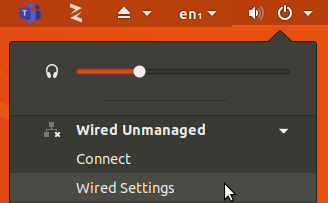
Click on the 'Wired Settings' menu item to open the Network settings screen.
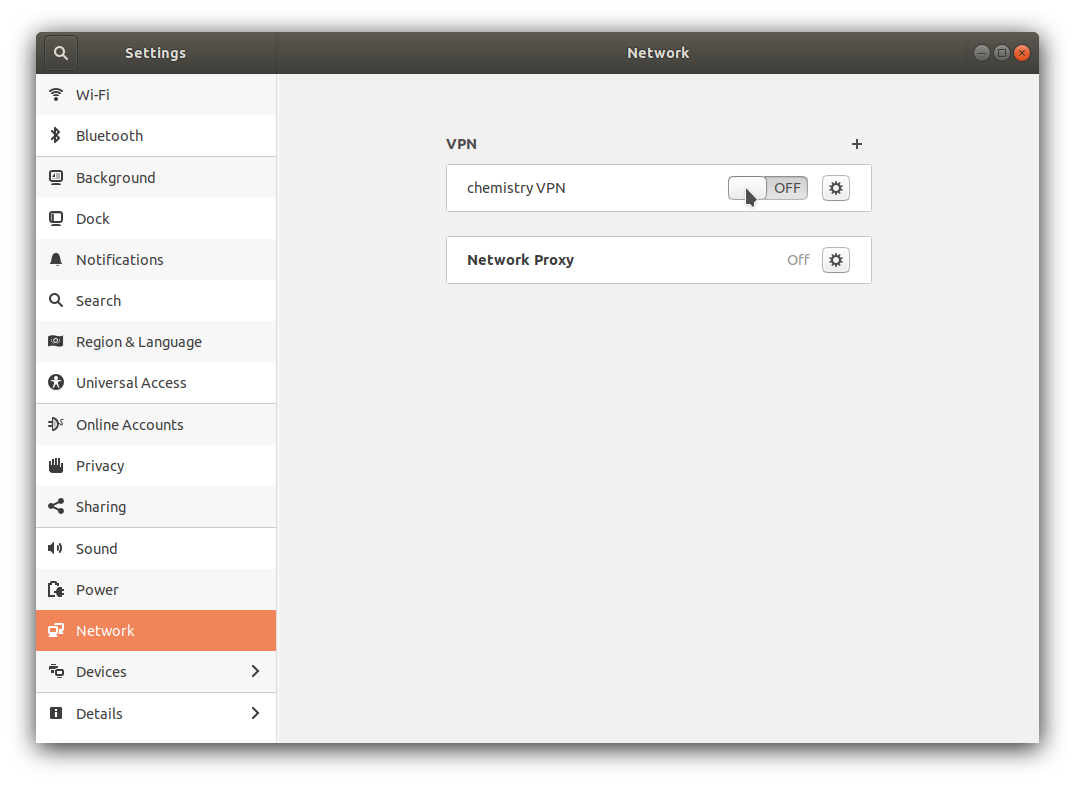
Alternatively, find the Network tab in the Settings application directly. Either way, you should end up with a screen similar to the following:
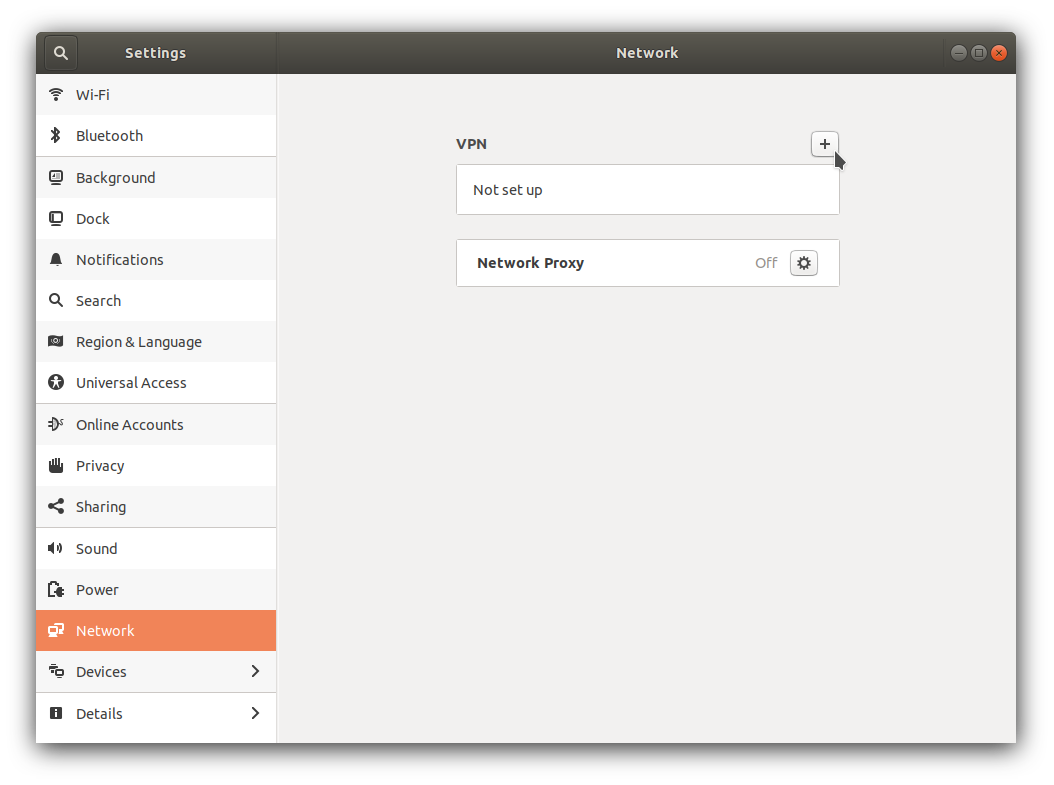
From the Network Connections screen, adjacent to the VPN heading, click the '+' (Add) button. On some versions of Linux, you may need to switch to a tab labelled 'VPN' first.
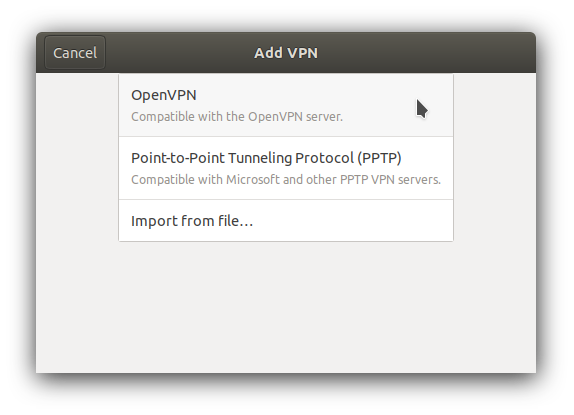
Import from file
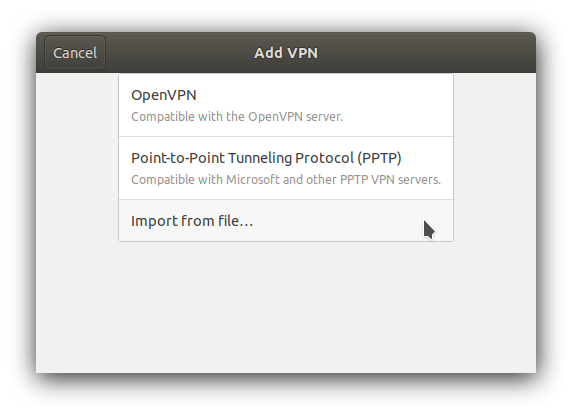
You may have an option to import a saved VPN connection. If you do, pick that one and use the config file here as the configuration to import.
(Note that if you do not see OpenVPN in the list, then the import won't work. Check you have installed the package as above.)
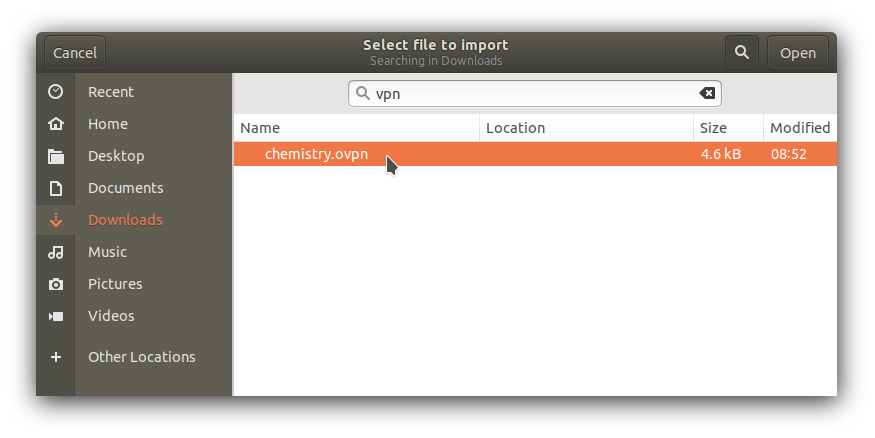
Select the file you just downloaded:
You should then see a screen similar to the following, where you will need to enter the "username" and "password" fields, but note that these take special forms and are NOT your usual Chemistry login.
- In the username field, enter your crsid followed by @ch.2025.cam.ac.uk.
- In the password field, enter your ChemNet token. Collect this from https://apps.ch.cam.ac.uk/ssms/collectchemnet
- You should leave the user key password field blank, and press the green "Add" button at the top of the dialog to finish.
You should then see the new connection appear in the list, which you can toggle on or off:
Check it works by looking at the message from the test page! If you only just installed the 'network-manager-openvpn-gnome' package, then you may need to reboot and then toggle the VPN on before it will work.
For help with any other issues, see the troubleshooting link at the bottom of this page.
Manual setup
If you don't have an option to import a saved config, you will have to set things up by hand.
The type of VPN used by the Department of Chemistry is OpenVPN, so you should select that option. Again, if there is no OpenVPN option, check that you have installed the correct package for your system.
OpenVPN uses some files which need to be saved onto your machine. It's important that these files don't get deleted, so create a directory somewhere safe like under your home directory. Put the following files in there (you may need to right-click on these links and choose "Save link as..." in order to download them):
Fill in the configuration for the VPN connection as below and select the files you just downloaded in the appopriate fields:
- Name: (doesn't matter but for example call it) chemistry
- Gateway: openvpn2027-2.ch.cam.ac.uk:443
- Type: Password with Certificates (TLS)
- User name: Your CRSID (the first part of your @cam email address) followed by @ch.2025.cam.ac.uk
- Password: Your ChemNet token. Collect this from https://apps.ch.cam.ac.uk/ssms/collectchemnet
- CA certificate: Select the file 'ca.crt' you downloaded earlier
- User certificate: Select the file 'client1.crt' you downloaded earlier
- User private key: Select the file 'client1.key' you downloaded earlier
- User key password: Leave this blank!
There are some more settings under 'Advanced' which should be changed:
On the 'General' tab, set:
- Use custom gateway port: should be left blank
- Use custom renegotiation interval: should be checked and set to zero
- Use LZO data compression: should be left blank
- Use a TCP connection: should be left blank
- Set virtual device type: select 'TUN' and set the name to 'tun'
- All other options should be left blank
Now go to the 'Security' tab and set the cipher setting to AES-256-GCM
The 'TLS Authentication', 'Proxy' and 'Misc' tabs don't need to have any changes.
Click 'OK'
Now you should be able to start the VPN by going to the Network Settings dialog and selecting it from the available VPNs.
Did it work?
Click on this link to find out.
Troubleshooting
There is troubleshooting information at https://www.ch.cam.ac.uk/computing/openvpn-troubleshooting
